What to Expect during a Roof Replacement

Jun 24, 2024

Roof replacement for your home.

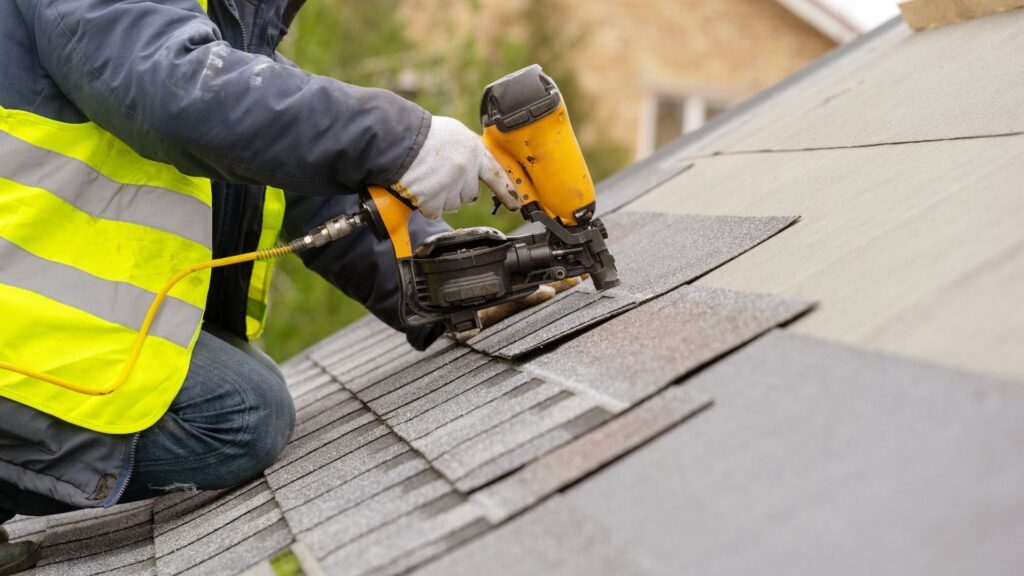
It’s unsettling to know the roof over your head is in disrepair, and it can be a relief to know your roof replacement is scheduled and about to happen! Most homeowners only need to replace their roof once or twice in their lifetime, so knowing what to expect can help you prepare for the process. 

Beginning with a roof inspection, estimate, and material selection, the steps prior to your replacement are vital. Your roof replacement will boost curb appeal and ensure your home is protected from the elements. Here’s what to expect during the process. 

What Happens When Your Roof Is Replaced 

Prior to the day of your roof replacement, a dumpster will be placed in your driveway so your current roof can be easily disposed of or recycled. Your new roof shingles and other roofing materials will also be delivered. 

It’s important to keep your driveway clear so there aren’t any incidents while your old roof is torn off and your new one is installed. Remove outdoor items like planters, bikes, toys, lawn furniture, and anything that could be damaged during your roof installation. 

To prevent accidents, make arrangements for your small children and pets so they won’t be in the construction zone while your roof is replaced. If the roofer isn’t planning on tarping your landscaping, it would be smart for you to do that before the crew arrives each day to preserve the beauty of your flowers and shrubs. 

1. Your current roof will be removed.

Your existing roofing components will be taken off and placed in a dumpster for disposal. This includes your old roof shingles, metal flashing, drip edge, underlayment and roof nails. 

Once your old roof is disposed of, your roof decking will be thoroughly inspected. If its current condition is not up to par, or if moisture infiltration has created wood rot or deterioration, those things will need to be remedied. 

2. If your decking or flashing are damaged, they will be repaired or replaced at this time.

Your roofer will meticulously ensure there is no hidden damage left unaddressed before installing your underlayment and roof shingles. 

3. Underlayment will be installed.

There are a variety of underlayment options, which you’ll discuss prior to installation day. Your underlayment is an essential component to your roofing system. It creates a barrier between your roofing shingles and decking material to safeguard your house from water damage. 

Felt underlayment offers a reliable, cost-effective option. Synthetic underlayment is a more significant investment, but it won’t rot, buckle or crack, making it a more dependable choice when it comes to performance. 

4. The valley flashing and drip edge will be installed.

Valley flashing channels moisture away from vital areas of your roof. It will be nailed to your roof decking before shingles are applied. A drip edge is a thin metal flashing that will be nailed over your underlayment around your roof perimeter. It helps channel water off your roof to minimize the possibility of leaks or moisture intrusion to your house. 

5. Starter shingles will be placed.

Starter shingles (which reduce the risk of shingle blow-off along the eaves and rakes of your roof, provides a base under the shingles at the eaves, and helps your roof shed water) will be installed along the bottom and side edges of your roof deck. 

6. Your roof shingles will be installed.

Your asphalt roof shingles will be applied, securing them with the proper roofing nails. Next, your hip and ridge shingles will be installed along your roof ridge (the very top of your roof) and hips (the external angle where adjacent sloping sides of your roof meet). 

7. Metal flashing will be fitted.

Metal flashing will be fitted securely around your chimney, skylights, vents, and other penetrations that are prone to leaks. This will help prevent moisture intrusion and contribute to the longevity of your roof. 

8. Your vents will be replaced. 

Proper ventilation is a vital part of your roofing system. Vents ensure that warm, moist air circulates out of your attic (which factors into the health and longevity of your roof) rather than accumulating in your attic. Your roofer will likely add to your current ventilation system or replace the vents you have, depending on the requirements of your roof. 

9. If you need new gutters, they will be installed. 

Your gutters have a vital job: to channel water away from your home. Keeping your gutters clean and in good working order helps prevent moisture intrusion on your roof decking. Gutter repair or replacement is smart, particularly when you get a roof replacement. 

10. A final walk-through is made.

A project manager will inspect and approve your roof’s installation. Your contractor will meet with you to finalize the project, and you’ll do a final walk-through together. 

11. Cleanup is performed.

The roofing contractor will do a sweep of your property with a large magnet to ensure there are no stray nails or debris left on it. The dumpster will be removed from your property. 

12. Your warranties will be registered.

Once your project is finished, your warranties will need to be registered. Some contractors (like us!) do this for you as a courtesy. In the unlikely event you need to use your warranty, you’ll be glad it was registered when your roof was installed. 

Enjoy a Beautiful, Durable New Roof for Your Minnesota Home 

At Lutgen Companies, we’ve served over 10,000 homeowners since 1983 with a personalized approach in everything from material selection to installation. We’re so committed to quality assurance that we test most products on our own home before recommending them to others. 

Once your new roof is installed, we register applicable warranties on your behalf. Learn more about how our roofing services can install a beautiful, durable, low-maintenance roof you’ll love coming home to.